After the Skopéin exhibition at the Stadtkirche Karlsruhe was enthusiastically received by visitors, Michael and I are currently experimenting with reconstructing this experience in virtual reality (VR). In doing so, we are pursuing two main objectives:
- We aim to recreate the church as realistically as possible1 and to transfer Skopéin into the virtual space on a 1:1 scale. This approach is intended to provide insights into the differences between a “physical” and a “virtual” media art installation.
- Additionally, we seek to significantly expand Skopéin – specifically the projection itself – by liberating it from its physical constraints.

To achieve this, we remodeled the church’s interior architecture in Blender. Since the model must function in VR – in our case, using an Meta Quest 3 – we must constantly ensure that we do not overburden the VR hardware with excessive computational load. Thus, the modeling process was conceived as a continuous compromise between visual opulence and minimalism.


Connecting Meta Quest 3 to Blender
During texturing and lighting, we experimented with Blender’s VR plugin (VR scene inspection), which allows the scene to be displayed in real-time on the Meta Quest. The setup process is a bit of a hassle, since it requires a suitable cable2, the Meta Quest Link app and the Meta Quest Developer Hub on the PC. Both apps need to run simultaneously and need to have a stable cable connection to the headset.

In order to avoid the error message in Blender’s VR scene inspection (“Failed to get device information. Is a device plugged in?”) set the link switch in the Meta Quest Developer App to ‘ON’ and the link to ‘Cable’. After that you should be able to start to trigger the ‘Start VR Session’ in Blender without any issues.
Although I had relatively low expectations initially, it became evident that working in Blender in VR was significantly more intuitive and ‘fun’. The ability to assume perspectives that closely resemble those of the end user was especially convenient. (It should be noted, however, that the real-time VR view only functions with EEVEE and not with Cycles.)

Exporting an comprehensive FBX from Blender for Unity
As beneficial as the VR link between Blender and the Quest was, our ultimate goal is to transfer the model into a robust environment – i.e. a professional game engine (in our case: Unity) in order to conduct user studies and to exhibit the installation. Consequently, after modeling and texturing, an export to a file format supported by Unity was necessary. For compatibility reasons, we opted for FBX.


The FBX export, however, is not straightforward when it comes to textures. Experimenting in Blender with VR led us to a workflow that was less focused on technical particularities and more driven by aesthetic considerations. By ‘moving fast and breaking things’ we employed a lot of approaches during our creative process in Blender that could not be directly represented in the FBX file format. Therefore we used quite a few tricks and hacks to achieve a certain visual look and feel in Blender that cannot be translated into an FBX. Nevertheless, since we will eventually rely on FBX due to the final application being built in Unity, it became necessary to ‘clean up’ the Blender file after the experimental phase. To achieve a seamless export from Blender to Unity, the following aspects had to be taken into account:
Learnings:
Materials:
- No nodes should exist between the
Texturenode and thePrincipled BSDFshader node. For example, while experimenting we used aContrastnode, which resulted in the material not being carried over into the FBX. Any adjustments (such as contrast, brightness, etc.) must therefore be applied directly to the image texture earlier in the pipeline. - The FBX export only supports a single shader type:
Principled BSDF. All other shader nodes are simply ignored (e.g., emissions must be handled through the emission input within thePrincipled BSDF, rather than through a separateEmission BSDFnode). - The Mapping Node, typically used between the Texture Coordinate and Image Texture Node, must be set to a ‘neutral‘ position, i.e.,
scaling = 1,1,1;rotation = 0,0,0; andlocation = 0,0,0. Any other settings will be ignored during the export. (The FBX exporter “doesn’t understand any nodes, only the normal map can have a normal map node“.) If scaling or rotation of the texture is still required, it must be done ‘manually’ in the UV editor by selecting all polygons associated with the texture and adjusting the texture in the UV editor. - In the FBX export settings, it is advisable to set the path mode to ‘Copy’. If a binary FBX is desired (i.e., if all materials/textures and mesh geometry are to be packaged into a single file), the ‘Embed Textures’ option (the small, inconspicuous button next to the dropdown) must be activated. Otherwise, Blender creates a folder at the export location where all the textures are saved as image files.
- Procedural textures generated within Blender (e.g., via
Noisenode) are not automatically exported, so they must be baked beforehand.
Normals:
- All objects need to feature ‘correct’ normals, i.e. before exporting it makes sense to recalculate all normals in Blender and do a visual check with backface culling turned on (and or with a view mode that displays the normal directaion) before exporting.
Lights:
- Only point and directional lights are exported. The area lights we used as fill lights are ignored during export. Correction: Unity will import the area lights but they are only available as baked lights. Since this will not improve our workflow we will do a complete light baking in Blender with Cycles first and import the baked textures into Unity.
Detour (?): Experiments with real time lighting in Unreal Engine
Since light plays such an important role in this VR experience I made some experiments with the real time lighting system in Unreal Engine 5.5 to determine if the Meta Quest 3 is capable of this kind of GPU-intensive calculations. Going this way forward it could be possible that we change the whole lighting inside the church on the fly (e.g. depending on the VR-user’s preferences, the time of the day, etc.). The first experiments look promising, although Unreal seems to be a little more picky in terms of mesh quality. (There were some n-gons at the outer wall structure that needed to be fixed in Blender before exporting an FBX.)

Also Unreal seems to sometimes confuse the UV-rotation of certain (not all!) textures when using a FBX with packed assets that was exported from Blender.

I do like Unreal’s workflow quite a bit. Especially the integration of the Skopéin-projection into the scene is quite convenient by using a single decal actor and configuring the material with a diffuse and alpha-map. (Set material domain to deferred decal and the blend mode to translucent.)

Props & scale
Both experiments in Unity and Unreal showed some potential for improvement in regard to the church’s 3D model. Firstly some textures need to be replaced and/or finetuned in order to avoid ugly repetition artifacts. Also some UV-maps had to be optimized.
The most important obervation was that the VR-user loses a sense of scale rather quickly when confronted with a mostly empty room/environment. Therefore we decided the we want to equip the vicinity with some props and furniture where everybody has at least a crude understanding of the real dimensions. By placing these objects in the vicinity of the user’s spawn point we hope that these objects articulate the scale/dimensions of the architecture a lot better than an empty environment.

After tweaking the textures and equipping the church with the furniture/probs, we will experiment what kind of direction we will continue to follow: Baking all textures and lighting with a ‘real’ raytracer in Blender and continue the development in Unity? Make use of the possibilities of real time lighting in Unreal? Developing a hybrid between real time and baked lights? Skopéin is to be continued.

Props Vol. 2 and architecture remodel
After some experiments, it became clear that the props such as furniture, candles, etc. enhance the spatial experience quite a bit. Therefore I dug out some reference photos from the original church and hand modeled a second batch of props in order to integrate into the church.

The object on the very right on the picture above shows a lamp that the original church also features. The model is extremely low poly, since the user will see this lamp only in the very far distance. The original lamp has a tempered glass in front of the bulbs, which would be quite heavy in terms of rendering/computation: Therefore, in my model I faked this by modeling only the frame and giving the inside of the frame a reflective surface, which works quite nicely.


When experimenting with the light conditions in the church, it came to my attention that I missed a key element in the modeling of the walls. The original church features a ‘light band’ at the top of the main walls that stretches over the complete length of the church main hall. With this light band the roof appears to be floating and the interior gets a lot more indirect lighting that is reflected by the ceiling. Therefore I did a remodel and manual remesh of the main architecture.

Texture Baking and Unity
Finally we settled with Unity as Game Engine for now, since we have the most experience with the tool. To keep the app performant (even on the limited specs of the Meta Quest 3) we decided that we conduct a full texture and shadow baking process in Blender and import the mesh and its materials as Unlit Textures in Unity so no real time light and shadow calculation is necessary (this meant that we needed correct and clean UV maps for every single object and baked the shadow and lighting into the texture). Since we used the URP -> Unlit shader pipeline in Unity, we did not need any further maps (such as normal, roughness, etc.).


Testing & Stageing: Exhibiting VR-Skopéin
While our iterative development process proved valuable, there’s no substitute for testing this application with real users. Our central guiding questions were:
- Can a media art exhibition, originally held in a physical space, be fully transferred as a ‘Digital Twin’ into a virtual environment? Here, we were particularly interested in the user experience and the aesthetic perception of this type of exhibition.
- How do users experience the exhibition in a virtual space?
- How can the threshold (i.e. the transition) between physical and virtual space be lowered?
- What pitfalls emerge, and which parameters can be adjusted to improve the virtual installation?
During the physical installation in a church, we observed visitors lying on the pews to take in the projection on the ceiling.
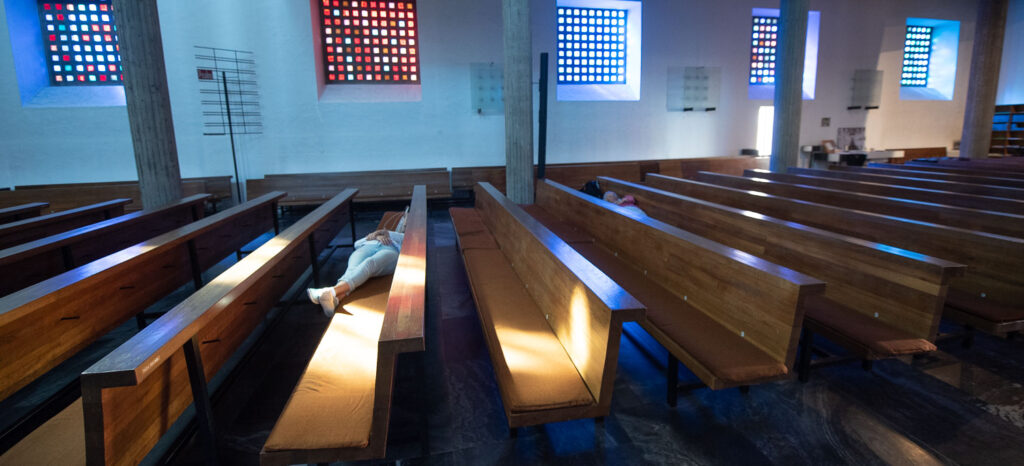
We found this gesture quite striking, as this type of interaction is rather unusual in a typical church setting. This suggested that Skopéin didn’t just transfer the imagination of the audience; it also created a kind of feedback loop with the physical space.
We found this phenomenon intriguing and were eager to replicate a comparable experience in the virtual installation. Consequently, we developed a concept centered on a comfortable reclining chair for VR users.

The use of virtual reality as an installation is always a balancing act between freedom and constraint.3 On one hand, the goal is to promote immersion and the feeling of ‘diving into’ the virtual world; on the other, the installation must be accessible to a broad audience. The reclining chair offers users a comfortable way to relax and enjoy the projection on the virtual ceiling without worrying about issues like balance or physical obstacles. At the same time, the chair allows for free rotation, enabling users to view the virtual church in 360°.

To ease the transition from physical to virtual space, we experimented with the idea of placing a 1:1 replica of a virtual object in the physical space. For this purpose, Michael created a highly detailed 3D print of a candlestick, which also exists in the virtual world. The aim was to provide users with a familiar reference to help them orient themselves in the virtual environment. Specifically, we wanted to present an at least superficially familiar object so that users could better gauge the scale of the virtual space.
Test Contexts and Target Audience
For our testing, we utilized three different locations in Skåne, Sweden:
Inter Arts Center in Malmö: This venue provided a more laboratory-like atmosphere.4

Kulturkvarteret Kristianstad: This location presented the installation on a stage within a ‘black box’.6

ÖSKG Tjörnedala Konsthall: This space displayed the installation in a classical exhibition room.

These three distinct contexts allowed us to test the installation in a variety of environments and gain valuable insights into the user experience. The exhibition was shown to a broad target audience that included both individuals with expertise in VR and digital media art as well as novices who were experiencing virtual reality for the first time.
Learnings from these testing exhibitions
- Audio is a significant parameter that we need to address in the future. Although we used the ambience (‘room sound’) of a real church during our exhibitions, a lot of users encouraged us to dig deeper into this field
- Paying attention to details during 3D modelling and texturing pays back: All users were impressed by the visual quality of the installation
- Scale and placement matters: Michael and I did a lot of experimenting to get the scale and placement of the observer ‘just right’, which was apprechiated by the users
- The chair works: No user reported discomfort during the VR-experience. They felt safe and sound and wanted to stay much longer in the VR space than we anticipated
- Especially in mostly monochromatic environments/spaces with missing details (such as in art galleries), the inside-out tracking of the Meta Quest 3 has some problems. Michael had the idea to mitigate this issue by 3D-printing small semi-transparent light cubes with a tiny LED that we hung from the ceiling in the exhibition space. The color schemes and design language of these cubes referred to the aesthetics of the original church windows. This setup worked quite well in providing enough details for the Quest’s tracking as well as enhancing the installation’s overall staging.
Audio (work in progress)
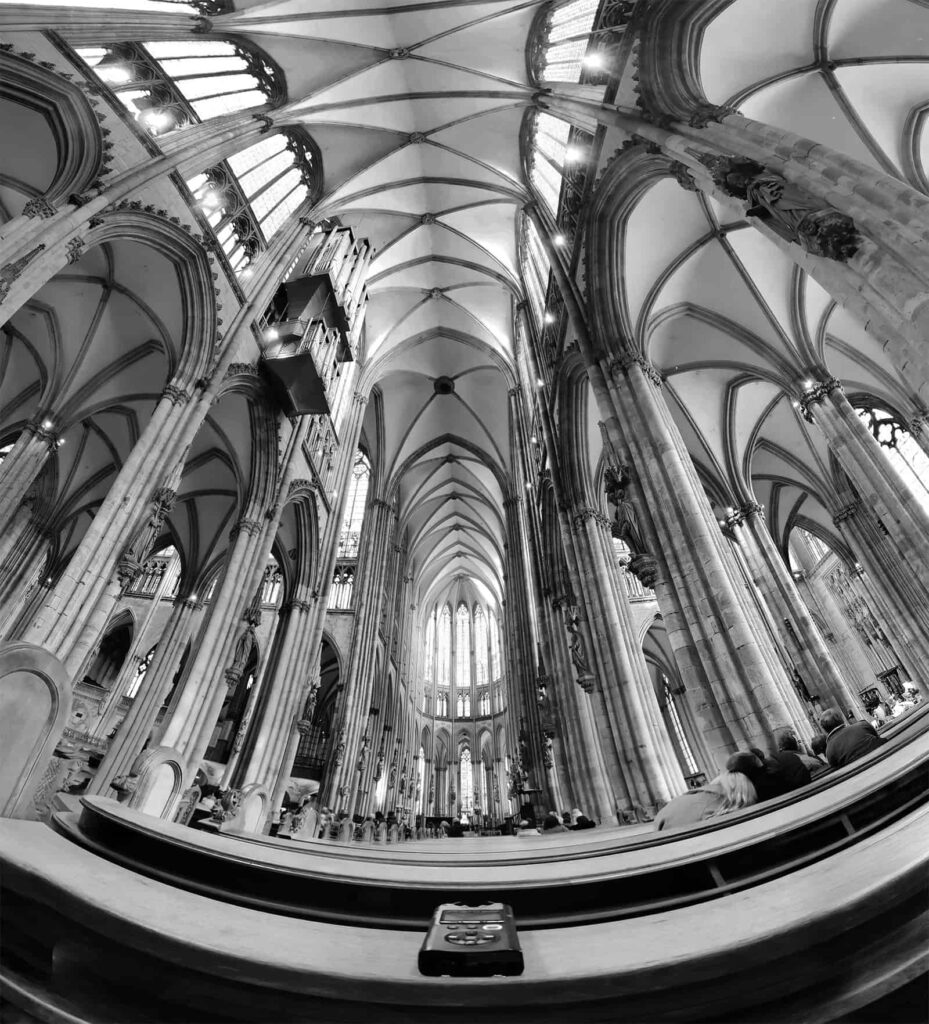
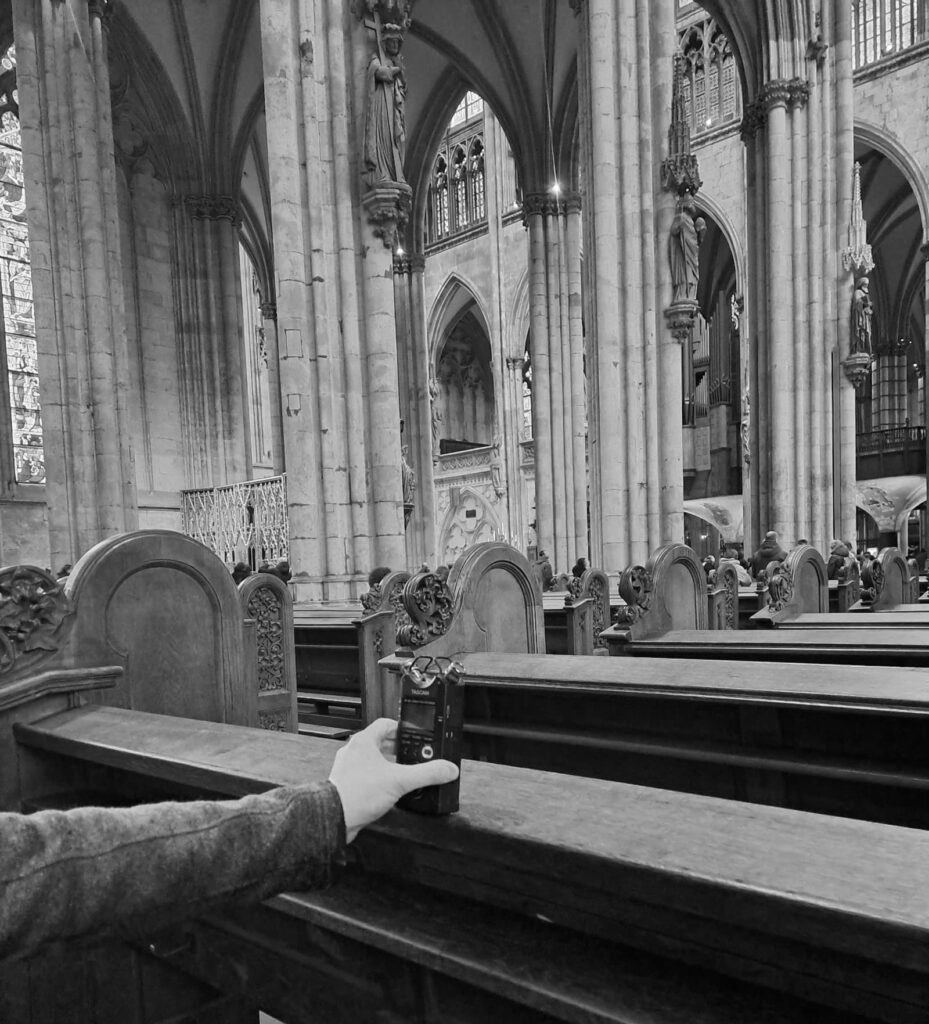
In the installations we used some background audio recordings of a ›generic‹ church’s acoustic atmosphere, which worked fairly well. Since we want to tailor the auditive experience in future exhibitions as well, we started to experiment with different spatial audio settings. In order to use exclusively self-produced material, I started to do some experiments to record the ambiance (›room tone‹) of a catholic church7 with similar size with a very basic recording setup (Tascam DR-40X mounted on a small Leofoto tripod). As reference I also recorded some ambient audio at a significantly larger church (Cologne cathedral) at a busy Saturday afternoon in order to compare (and possibly mix) the different atmospheres.


Footnotes
- By “realistic,” we do not mean striving for actual photorealism; rather, our goal is to transfer the atmosphere that was palpable in the church at that time as effectively as possible into VR. In this sense, the concept of verisimilitude or believability would be more appropriate than realism. This means focusing less on visual accuracy and more on capturing and conveying the essence and feeling of the space, allowing the virtual experience to evoke the same sense of presence and ambiance as the original installation in the church. ↩︎
- I experimented with a lot of different cables, but the only one that worked reliably was the quite expensive original cable from Meta’s store. Make also sure that your motherboard is able to output with a USB-C connector since adapters from USB-A to USB-C also cause some issues like lag or disconnects. ↩︎
- See, for example our VR installation Super Nubibus that used a phyical balloon basket, that the users could also touch in VR. Direct link. ↩︎
- Link to the announcement on the Inter Arts Center website here (archive.org backup) ↩︎
- I learned recently that there is a difference between background audio (i.e. audio that is only noticed, if it is missing) and foreground audio (i.e. audio that is designed to be noticed right away). ↩︎
- Link to the announcement (in Swedish) on the website here (archive.org backup) ↩︎
- Catholic churches are a lot more accessible since they are open to the general public during most of the days. To avoid interrupting the contemplation of other visitors I deliberately chose to use a very limited recording setup. ↩︎
- Full disclosure: This wide angle panorama image was created by merging several images. Denoising was done with generative models (AI). ↩︎