I am currently experimenting with OpenAI’s Codex, and it has already reduced my development time quite a bit. Recently, I used it to build a few useful plugins for my 3D software of choice: Blender.
All of these tools are written entirely in Python. Since Blender includes a full GUI library, creating small user interfaces is relatively straightforward. Below are a few tools I have built and currently use in my workflow.
Arch Creator
Back when I was using Cinema 4D, one of my must-have plugins was a tool called ArcSpline, a tool for generating procedural arches that could be used, for windows, vaults, cathedrals, and similar architectural elements. (This tool seems to be totally forgotten by now, since I can’t find it anywhere on the web. Maybe my memory is corrupted…)
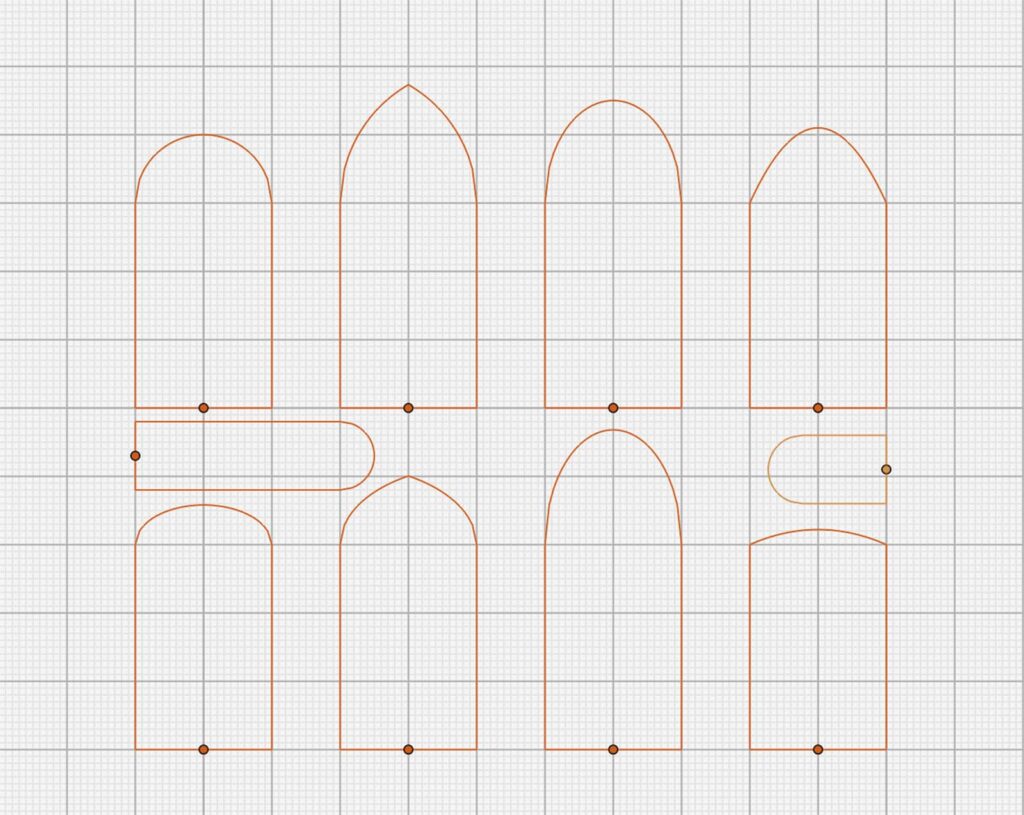
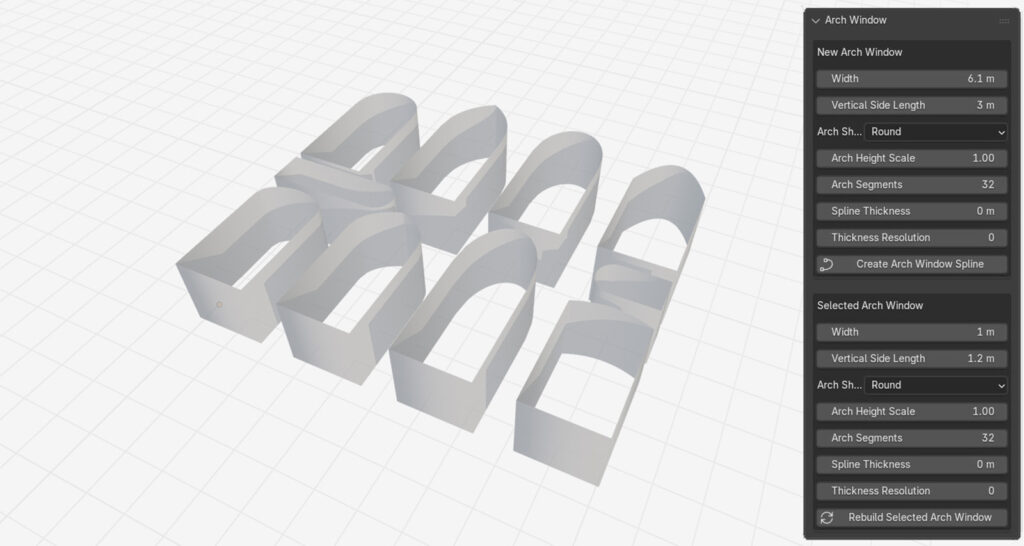
Anyway, I wanted the same kind of convenience in Blender, so I created a small plugin that can procedurally generate different types of arches with adjustable widths and heights. Since the output is based on splines rather than polylines, it can also make full use of Blender’s native spline feature set, including geometry settings, profile curves, beveling, and more.
Bob the (Brutalist) Builder
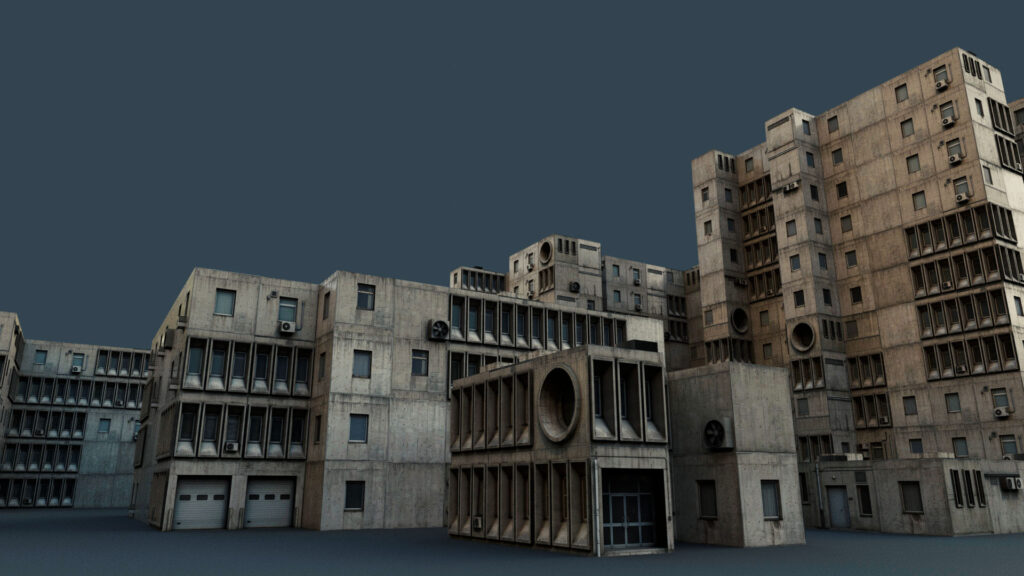
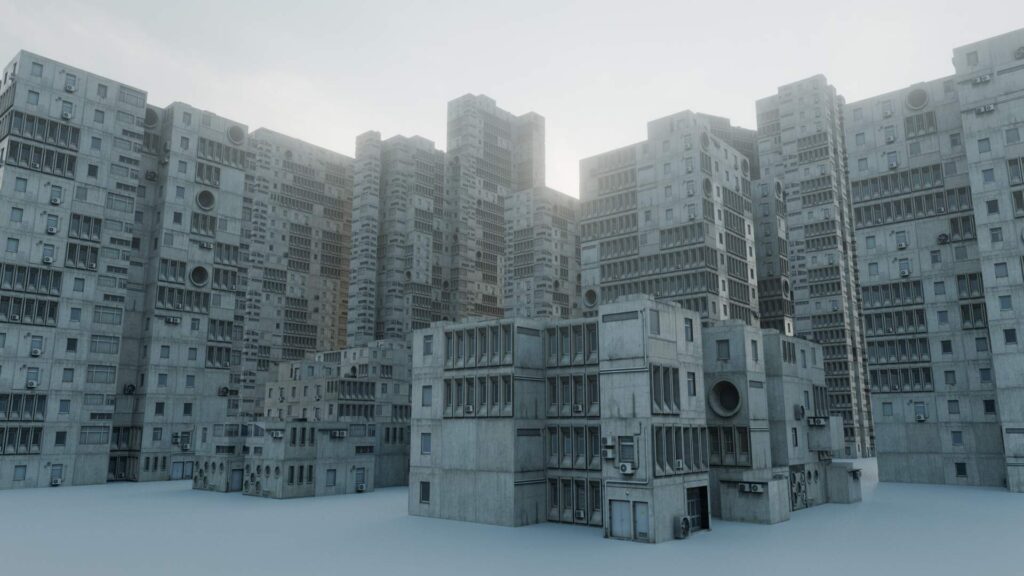
This tool is designed to quickly and procedurally create buildings and structures from predefined components. I originally built it to generate architecture inspired by Eastern European post-Soviet styles, but it works quite well with other architectural styles too, as long as the components are designed accordingly.
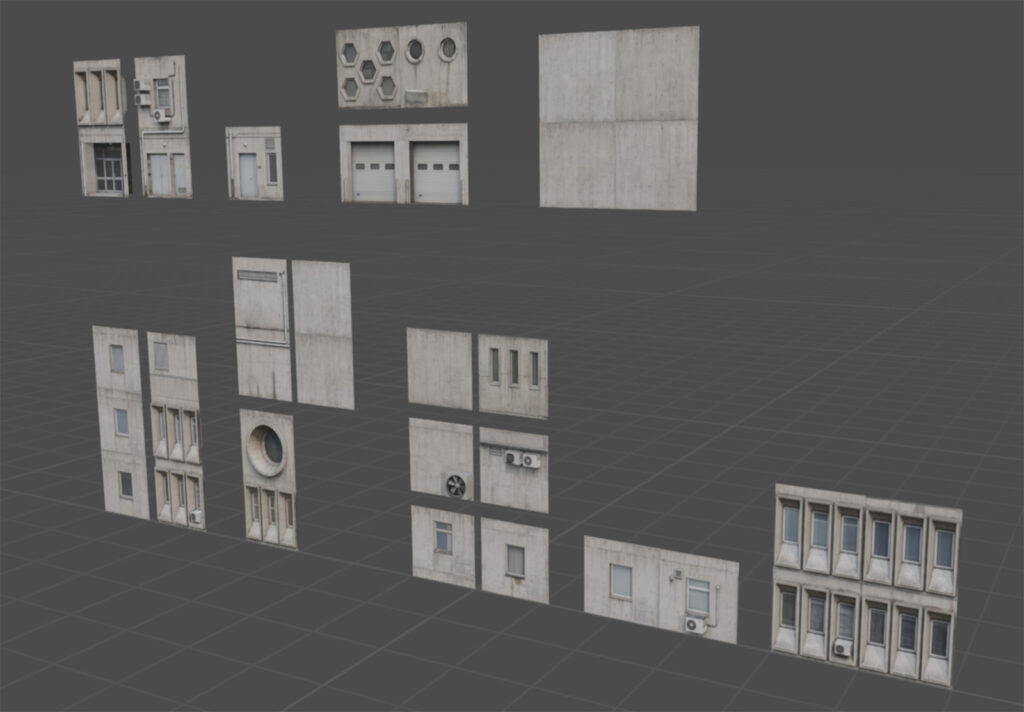
One of my main goals was to use hand-made components, giving me direct control over polygon density, mesh quality, and texturing. I am quite pleased that even relatively low-poly assets can achieve this level of visual fidelity when combined procedurally.
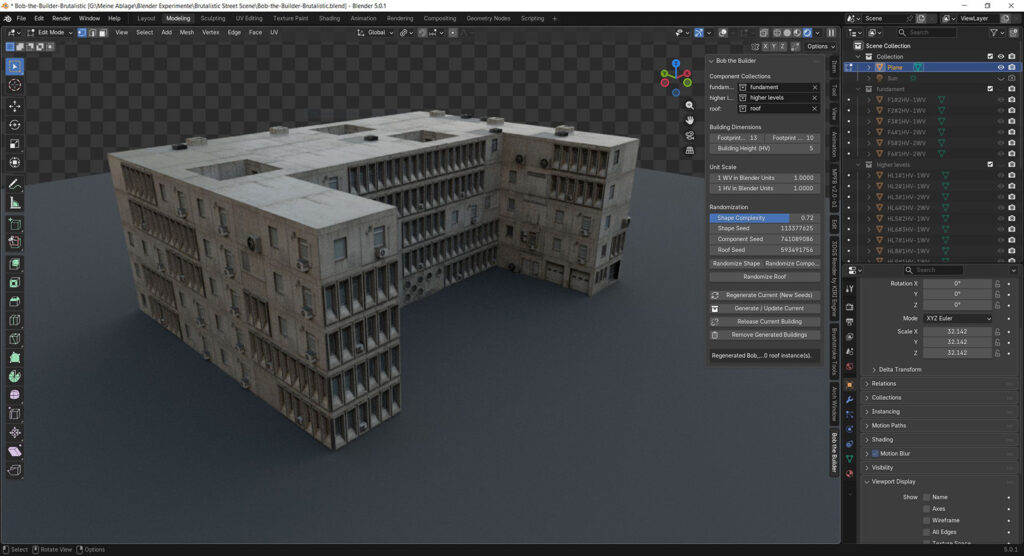
The tool allows the user to define a building’s width and height. Based on these parameters, along with a randomization value and a building complexity factor, the plugin calculates a basic floor plan. The user can then choose which collections should be used for the ground floor, upper floors, and roof. This makes it possible to use dedicated assets for doors, entrances, roof details, and other structural elements.
At its core, the tool calculates the best randomized tiling solution in three dimensions. This means that each hand-made component can have different dimensions and aspect ratios, such as 1x1, 1x2, or 3x4. This allows for a good amount of variation and creative control when designing the individual building blocks.
For additional variation, dedicated corner components can also be used, such as diagonal entrances, columns, arcades, and similar details. Their distribution is handled intelligently: the tool takes a user-defined spawn probability into account and only places a component when there is enough space and no intersection with other components.
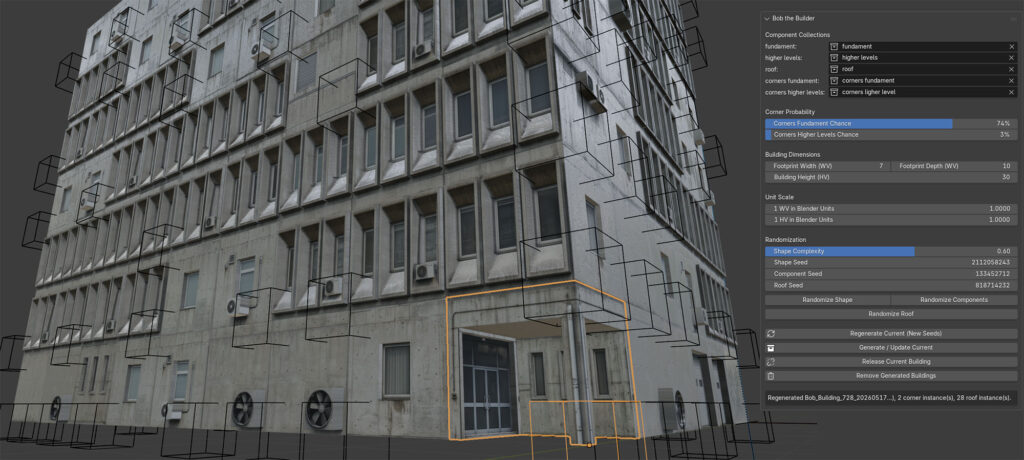
Initially, the algorithm calculated each component’s bounding box automatically. However, this approach did not scale particularly well and caused issues with meshes that included overhangs or insets. I therefore changed the system so that the plugin derives each component’s dimensions from its name.
Each mesh component has to follow this naming convention: component_name#1HV-2WV
The code scans each object name for the hash (#) symbol. It then reads the number before HV, which stands for “height value”, and the number before WV, which stands for “width value”. These values correspond to Blender’s unit system, where 1HV = 1WV = 1 meter.
The plugin also includes a conversion system for existing components that do not yet follow this naming convention, although that part is still a little buggy at the moment.
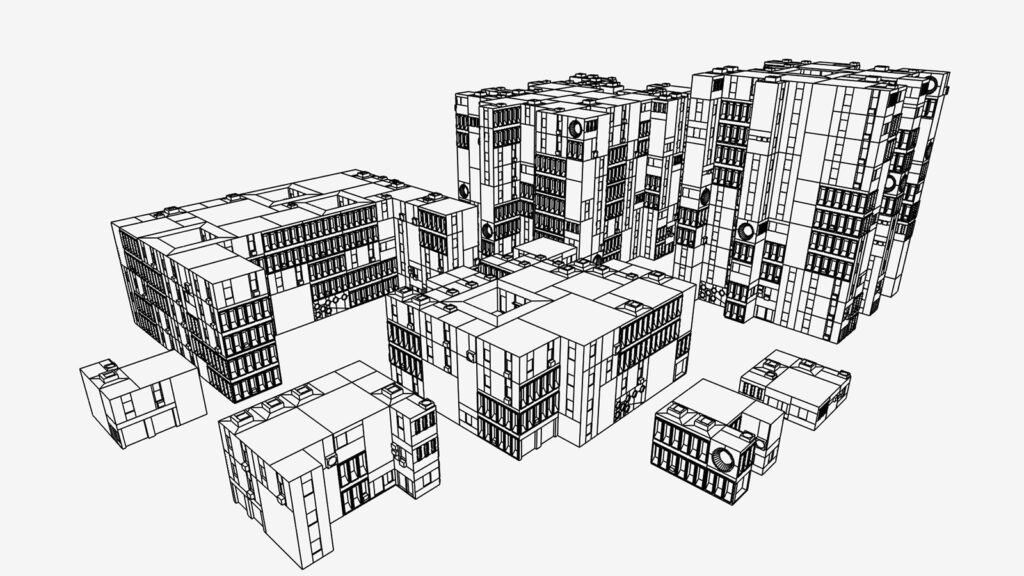
Overall, this project has been a lot of fun to work on. It gives me full artistic control over every component, allows me to keep the meshes clean and relatively low-poly for future game-engine use, and makes it possible to create cityscapes and architectural environments very quickly.
Once I have finished testing and tweaking the tool, I plan to release both the code and a Brutalist Blender scene as open source.